


Hey, cookie lovers! Is there anything more elegant yet comforting than a Pepperidge Farm Milano cookie? That crisp, buttery shortbread sandwiching a layer of rich chocolate—it’s the kind of treat that feels fancy but hits all the cozy spots. Let’s recreate that magic at home. Bonus: I’ve included a gluten-free version. Let’s make some Milano inspired goodness together!
These copycat Milanos are surprisingly simple to whip up, and they taste so close to the originals you’ll wonder why you didn’t try this sooner. Crispy, delicate cookies with a smooth chocolate center—perfection in every bite. Ready? Let’s get started.
Makes 12 to 18 double-sided filled cookies.
Ingredients
For the Regular Cookies:
- 1 cup (2 sticks) unsalted butter, softened
- 3/4 cup granulated sugar
- 1 tsp vanilla extract
- 1/2 tsp almond extract (optional, for that subtle Milano vibe)
- 1 large egg
- 2 cups all-purpose flour
- 1/4 tsp salt
- 1/2 tsp baking powder
For the Gluten-Free Cookies:
- Swap the all-purpose flour for 2 cups of a gluten-free all-purpose flour blend (like Bob’s Red Mill 1:1 Baking Flour). This GF flour includes xanthan gum.
- If your blend doesn’t include it, add 1/2 tsp xanthan gum
For the Chocolate Filling:
- 6 oz semi-sweet chocolate chips (or milk chocolate if you prefer the classic Milano taste)
- 2 tbsp heavy cream (or a dairy-free alternative)
Instructions
Step 1: Make the Cookie Dough
- In a large bowl, beat the butter and sugar together with a hand mixer until creamy and light, about 2-3 minutes.
- Mix in the vanilla extract, almond extract (if using), and the egg until everything’s smooth and happy.
- For the regular version, whisk the flour, salt, and baking powder together in a separate bowl. For gluten-free, whisk in the gluten-free flour blend and, if needed, xanthan gum.
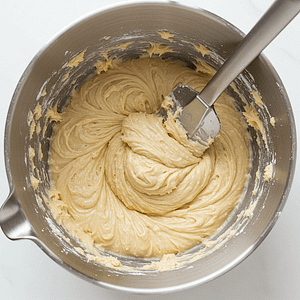
- Gradually add the dry ingredients to the wet mixture, mixing until a soft dough forms. It should be pipeable but not runny.
Step 2: Shape the Cookies
- Line two cookie sheets with parchment paper. Set aside. You may need more than two.
- Form a log with a 2 1/2 to 3 inch diameter. Wrap dough log in plastic wrap.
- Refrigerate for at least one hour.
- Preheat your oven to 350°F (175°C)
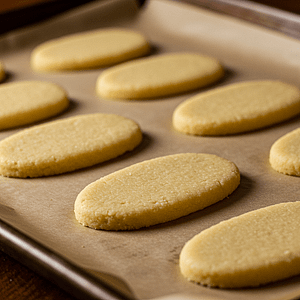
- Unwrap dough log and slice cookies about 1/4 inch thick. Place on the baking sheet, spacing them about an inch apart—they’ll spread a little.
- Bake for 10-12 minutes, until the edges are lightly golden. Let them cool completely on the sheet—they’ll crisp up as they sit.
Step 3: Make the Chocolate Filling
- In a microwave-safe bowl, combine the chocolate chips and heavy cream. Microwave in 30-second bursts, stirring between each, until melted and smooth. (Alternatively, use a double boiler.) Let it cool slightly—it should be spreadable but not runny.

Step 4: Assemble the Milanos
- Once the cookies are cool, pair them up by size (they won’t all be perfect, and that’s okay!).
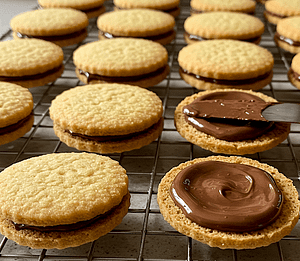
- Spread a thin layer of chocolate filling on the flat side of one cookie, then sandwich it with another. Press gently so the chocolate peeks out just a bit—Milano style!
- Let the cookies set at room temperature for about 30 minutes, or pop them in the fridge for 10 minutes to speed things up.
Tips for Success
- Chocolate Consistency: If the filling gets too thick, warm it slightly to keep it spreadable.
- Storage: Store these in an airtight container at room temp for up to a week, or freeze for up to a month. They’re delightful chilled, too!
- Flavor Additions: Add 1/4 teaspoon orange or mint extract to the dough for Orange or Mint Milanos.
- You can make these soft or crispy depending on the thickness and how long you bake them.
Why You’ll Love These
These homemade Milanos capture that signature Pepperidge Farm elegance—crisp, buttery cookies with a silky chocolate heart. The regular version is melt-in-your-mouth delicious, and the gluten-free adaptation holds its own with the same satisfying taste and feel. They’re perfect for a coffee break, a late-night snack, or just because you deserve something special.
What do you think—ready to bake your own Milanos? Drop a comment below with your thoughts. You can also share pics of your cookies on Facebook or Instagram. I’d love to see how they turn out! Happy baking, everyone!

Have a delicious day!
Disclaimer:
This post contains affiliate links. If you purchase something through these links, I may earn a small commission at no extra cost to you. Every click helps support my work, and the time I pour into creating content I love to share. Thank you so much!
If you enjoy what you see, please Like, Share, Follow, and Subscribe. I’m also working hard to qualify for the Amazon Associates program, so if something catches your eye, I’d be grateful if you’d consider purchasing through my links. I only recommend products I genuinely use and trust.
Thank you again for being part of the hive!
Please Pass It On!

Discover more from The Janny Bee
Subscribe to get the latest posts sent to your email.