
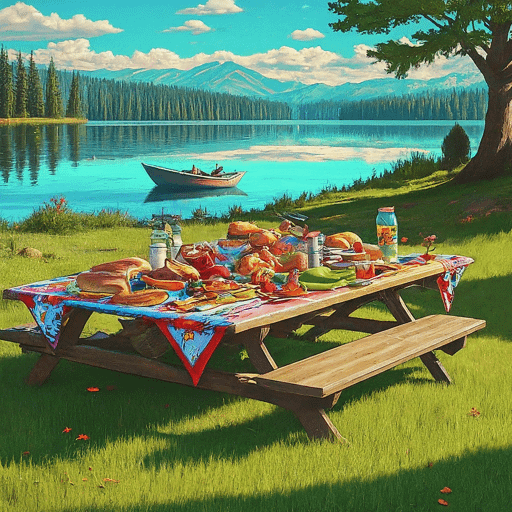
There’s nothing quite like a beach picnic on a beautiful day. The sun is shining, the water is inviting, and you are with the ones you care about. It’s the perfect way to relax and enjoy the outdoors. Ocean, lake, river, stream, or pond it doesn’t matter! Whether you are going to take a full swim, wade, or just enjoy the view, a fun time will be had by all! With a little planning, the day will be fun and go as smooth as sunscreen on a warm shoulder.
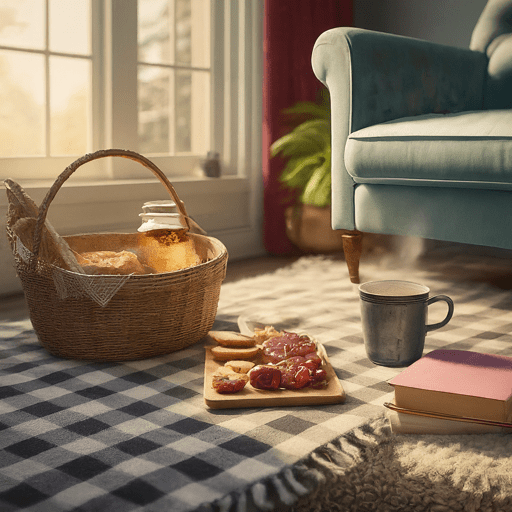
This post is about beach picnics, but the recipes and tips can be used anytime and anywhere. Put a blanket down on your living room floor in the middle of winter and have a picnic. The kids will love it!
KISS – Keep It Simple Sunshine!
Remember that people will not know that you were planning on bringing a ton of food and then decided to cut it down to a few really good things. They will be happy with the great food you brought and will have an amazing time! Sometimes (a lot of times) less is more!
Menu Planning
Plan your menu. Sure, you could just go to the nearest fast-food joint and get a big bag or bucket of stuff, but why not put the effort in and make it memorable with delicious wholesome food? Let the other picnic goers know you thought of them.
When planning your menu, keep in mind that you’ll be eating on the beach. I know that sounds stupid but keep in mind that you’ll want to pack foods that are easy to eat and don’t require a lot of utensils. What if it gets windy? No one likes sand or their hair in their food!
Sure, burgers, hotdogs, ham n’ cheese or PB&J sandwiches are great, but there are so many other amazing things to serve at a beach picnic.
Appetizers & Snack Foods
- Sliced fruits or a favorite fruit salad
- Sliced Vegetables
- Sliced Meats
- Sliced or cubed cheeses
- Chips & Dips such as Tzatziki, Spinach Dip, or Onion Dip. Bring big bags of tortillas. The veggies can be dipped as well.
Everyone can make their own hors d’oeuvres from the above sliced and cubed foods.
Wraps
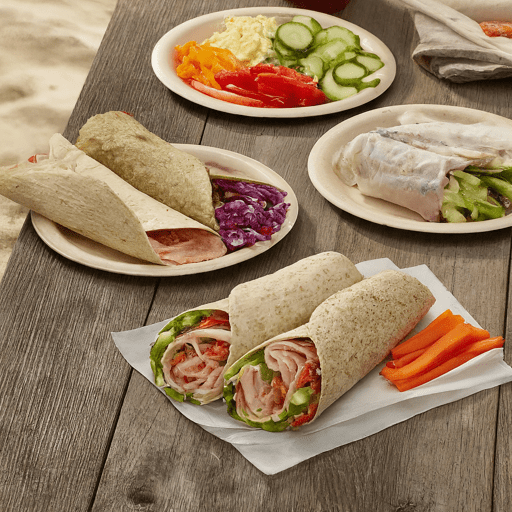
Bring your favorite sandwich wrap, tortillas, flatbreads, sliced cold cuts, cheeses, pickles, jalapenos, olives, and condiments. Have people assemble their own or they can “order” a wrap from you.
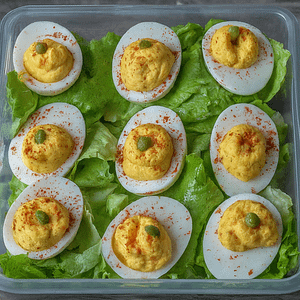
Deviled Eggs
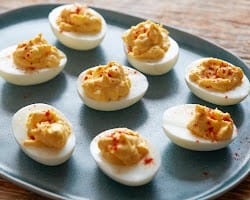
My all-time favorite picnic treat! Check out my article on Deviled Eggs here.
Tip: it is actually easy to travel with deviled eggs. Just line the bottom of a container or plate with lettuce or shredded cabbage. The lettuce or cabbage acts like little nests to keep the eggs upright and all that good filling from spilling out. I like to use a plastic square or rectangle container with a lid.
Salads
Tuna Salad
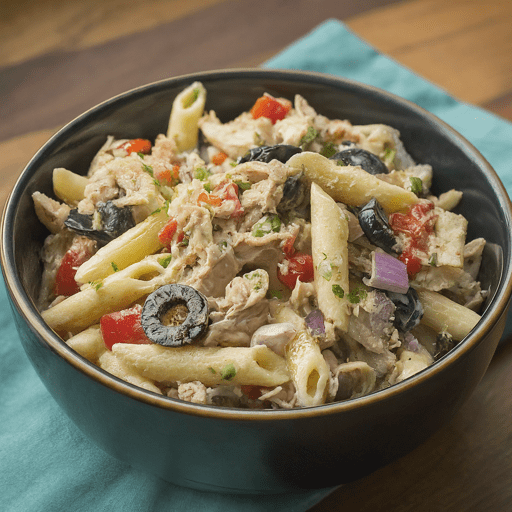
- 8 ounces (225g) pasta (penne, rotini, or your choice)
- 1 can tuna, drained
- 1/2 cup mayonnaise
- 1/4 cup diced red onion
- 1/4 cup diced celery
- 1/4 cup diced red bell pepper
- 1/4 cup sliced black olives
- 2 tablespoons chopped fresh parsley (optional)
- 2 tablespoons lemon juice
- Salt and pepper to taste
- Cook the pasta according to the package instructions until al dente. Drain and rinse with cold water to stop the cooking process. Set aside.
- In a large bowl, combine the drained tuna, mayonnaise, red onion, celery, red bell pepper, black olives, parsley (if using), and lemon juice. Mix well to combine.
- Add the cooked and cooled pasta to the tuna mixture. Gently toss to coat the pasta evenly with the dressing.
- Season with salt and pepper to taste. Adjust the amount of mayonnaise and lemon juice if desired, to achieve the desired consistency and flavor.
- Cover the bowl and refrigerate for at least 1 hour to allow the flavors to meld together.
- Serve chilled and enjoy!
Customize this recipe by adding diced tomatoes, cucumber, roasted red peppers, or shredded cheese. Can easily be doubled, tripled, etc.
Pesto Pasta Salad

- 8 ounces (225g) pasta (penne, fusilli, or your choice)
- 1/2 cup basil pesto (homemade or store-bought)
- 1 cup cherry or grape tomatoes, halved
- 1/2 cup sliced black olives
- 1/4 cup diced red onion
- 1/4 cup diced sun-dried tomatoes (optional)
- 1/4 cup grated Parmesan cheese
- 2 tablespoons pine nuts, toasted (optional)
- Fresh basil leaves, for garnish
- Salt and pepper to taste
- Cook the pasta according to the package instructions until al dente. Drain and rinse with cold water to stop the cooking process. Set aside.
- In a large bowl, combine the cooked pasta, basil pesto, cherry tomatoes, black olives, red onion, sun-dried tomatoes (if using), and Parmesan cheese. Mix well to coat the pasta evenly with the pesto and incorporate the ingredients.
- Season with salt and pepper to taste. Adjust the amount of pesto if desired, to achieve the desired flavor.
- Sprinkle toasted pine nuts (if using) over the pasta salad for added crunch and nuttiness.
- Garnish with fresh basil leaves.
- Cover the bowl and refrigerate for at least 1 hour to allow the flavors to meld together.
- Serve chilled and enjoy!
You can also add grilled chicken, shrimp, or roasted vegetables to make it more substantial. It can easily be doubled, tripled, etc.
Classic Italian Pasta Salad
- 1 pound (454g) dried pasta (such as rotini, penne, or fusilli)
- 1 cup salami or pepperoni, diced
- 1/2 cup chopped red bell pepper
- 1/2 cup chopped green bell pepper
- 1/2 cup diced red onion
- 1 cup cherry or grape tomatoes, halved
- 1/2 cup pitted kalamata olives, halved
- 1/2 cup crumbled mozzarella cheese (fresh or part-skim)
- 1/4 cup chopped fresh parsley
- Cook the pasta according to package directions. Drain and rinse with cold water to stop cooking.
- While the pasta is cooking, prepare the dressing. In a small bowl, whisk together olive oil, red wine vinegar, lemon juice, oregano, garlic powder, salt, and pepper.
- In a large bowl, combine the cooked pasta, salami, bell peppers, red onion, cherry tomatoes, olives, and mozzarella cheese.
- Pour the dressing over the pasta salad and toss to coat evenly.
- Stir in fresh parsley and refrigerate for at least 30 minutes before serving.
Tips:
- Customize the vegetables to your liking. You can add chopped cucumbers, artichoke hearts, or roasted vegetables like roast red peppers.
- For a vegetarian option, omit the salami or pepperoni.
- If you prefer a creamier dressing, you can add a tablespoon of mayonnaise or sour cream to the dressing.
Homemade Italian Dressing
- 1/2 cup olive oil
- 1/4 cup red wine vinegar
- 1 tablespoon lemon juice
- 1 teaspoon dried oregano
- 1/2 teaspoon garlic powder
- 1/4 teaspoon salt
- 1/4 teaspoon freshly ground black pepper
Mix or shake all ingredients together. Store in fridge. Use for sandwiches or wraps as well.
Caprese Pasta Salad

Talk about delicious, this pasta salad has it all! Click here to be taken to it.
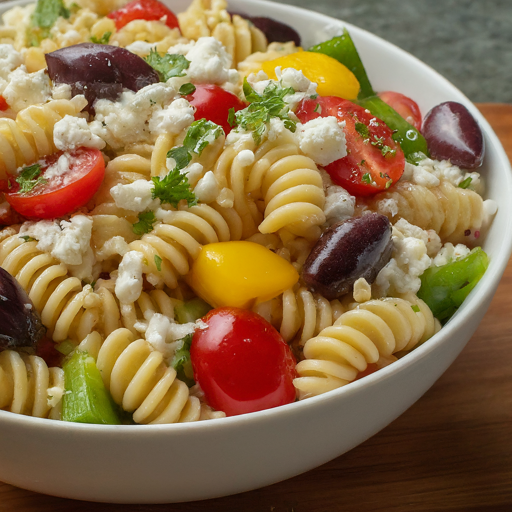
Greek Pasta Salad
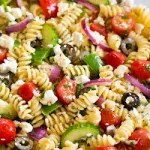
Have you ever been to a Greek diner? That is practically an oxymoron. Please do not take this the wrong way. I love Greece and Greek people but, in the U.S.A. most diners are owned by Greeks. So, if you’ve been to a diner, there is a good chance you have been to a Greek diner. Why? I guess they just have a knack for it and are the best at it. I’m certainly not going to argue! Here is an amazing Greek pasta salad that definitely could be found in the best of Greek diners.
Click here to be taken to it.
Pasta Salad Tip: Cheese filled tortellini is amazing instead of plain pasta. It adds protein as well.
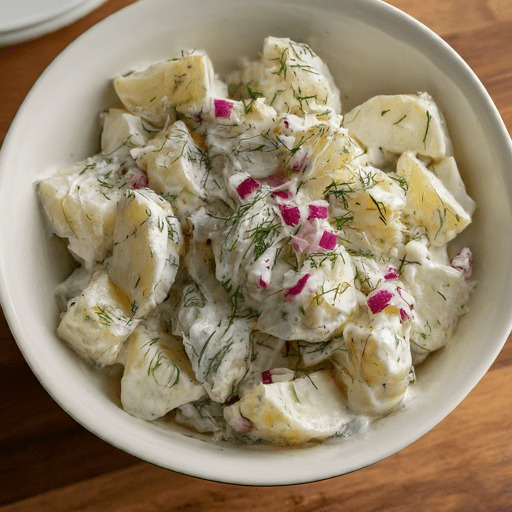
Potato Salad ( many ways )
This recipe is a fantastic base for a variety of potato salad creations. It’s simple, flavorful, and easily customizable to suit your taste buds. Bring more than one to the picnic.

- 4 pounds (1.8kg) russet potatoes, peeled and cubed
- 1/2 cup mayonnaise
- 1/4 cup Dijon mustard
- 2 tablespoons vinegar of your choice
- 1 tablespoon olive oil
- 1/2 teaspoon celery seed
- 1/4 teaspoon salt
- 1/4 teaspoon freshly ground black pepper
- 1/4 cup chopped red onion (optional)
- 2 celery stalks, diced (optional)
- 1/2 cup chopped fresh dill (optional)
- 4 hard-boiled eggs, chopped (optional)
- In a large pot, cover potatoes with cold water and bring to a boil. Cook for 15-20 minutes, or until fork-tender. Drain and rince with cold water. Return potatoes to the pot.
- While the potatoes are hot, mash them slightly with a potato masher (leaving some chunks for texture). This is optional. You can leave the cubes whole.
- In a separate bowl, whisk together mayonnaise, Dijon mustard, vinegar, olive oil, celery seed, salt, and pepper.
- Pour the dressing over the potatoes and gently fold to combine.
- Cover and refrigerate until desired coldness.
Optional Additions: Once the potato salad is cool, stir in any of the following ingredients:
- Chopped red onion
- Halved cherry or grape tomatoes
- Diced celery
- Chopped fresh dill
- Chopped hard-boiled eggs
- Chopped, halved, or whole olives
- Capers
- Cooked and crumbled bacon
- Chopped pickles or pickle relish
- Diced roasted vegetables (peppers, corn, zucchini)
- Salsa
- Chopped fresh herbs (parsley, chives)
- Experiment with different mustards, such as Honey or Spicey
Tips for Variations:
- Creamy vs. Chunky: Adjust the amount of mashing for your desired texture. More mashing creates a creamier salad, while less mashing keeps it chunky.
- Sweet vs. Tangy: For a sweeter flavor, add a tablespoon of honey or sugar to the dressing. For a tangier taste, increase the vinegar to 1/3 cup.
- Herbivore vs. Carnivore: Omit the bacon for a vegetarian option. For a heartier salad, add cooked and crumbled sausage or chicken.
- Spicy vs. Mild: Include a pinch of cayenne pepper or a teaspoon of hot sauce to the dressing for a kick.
However you make it, you can’t go wrong. Almost everyone loves potato salad. If they don’t, I’ll take their portion!
Dessert Anyone?
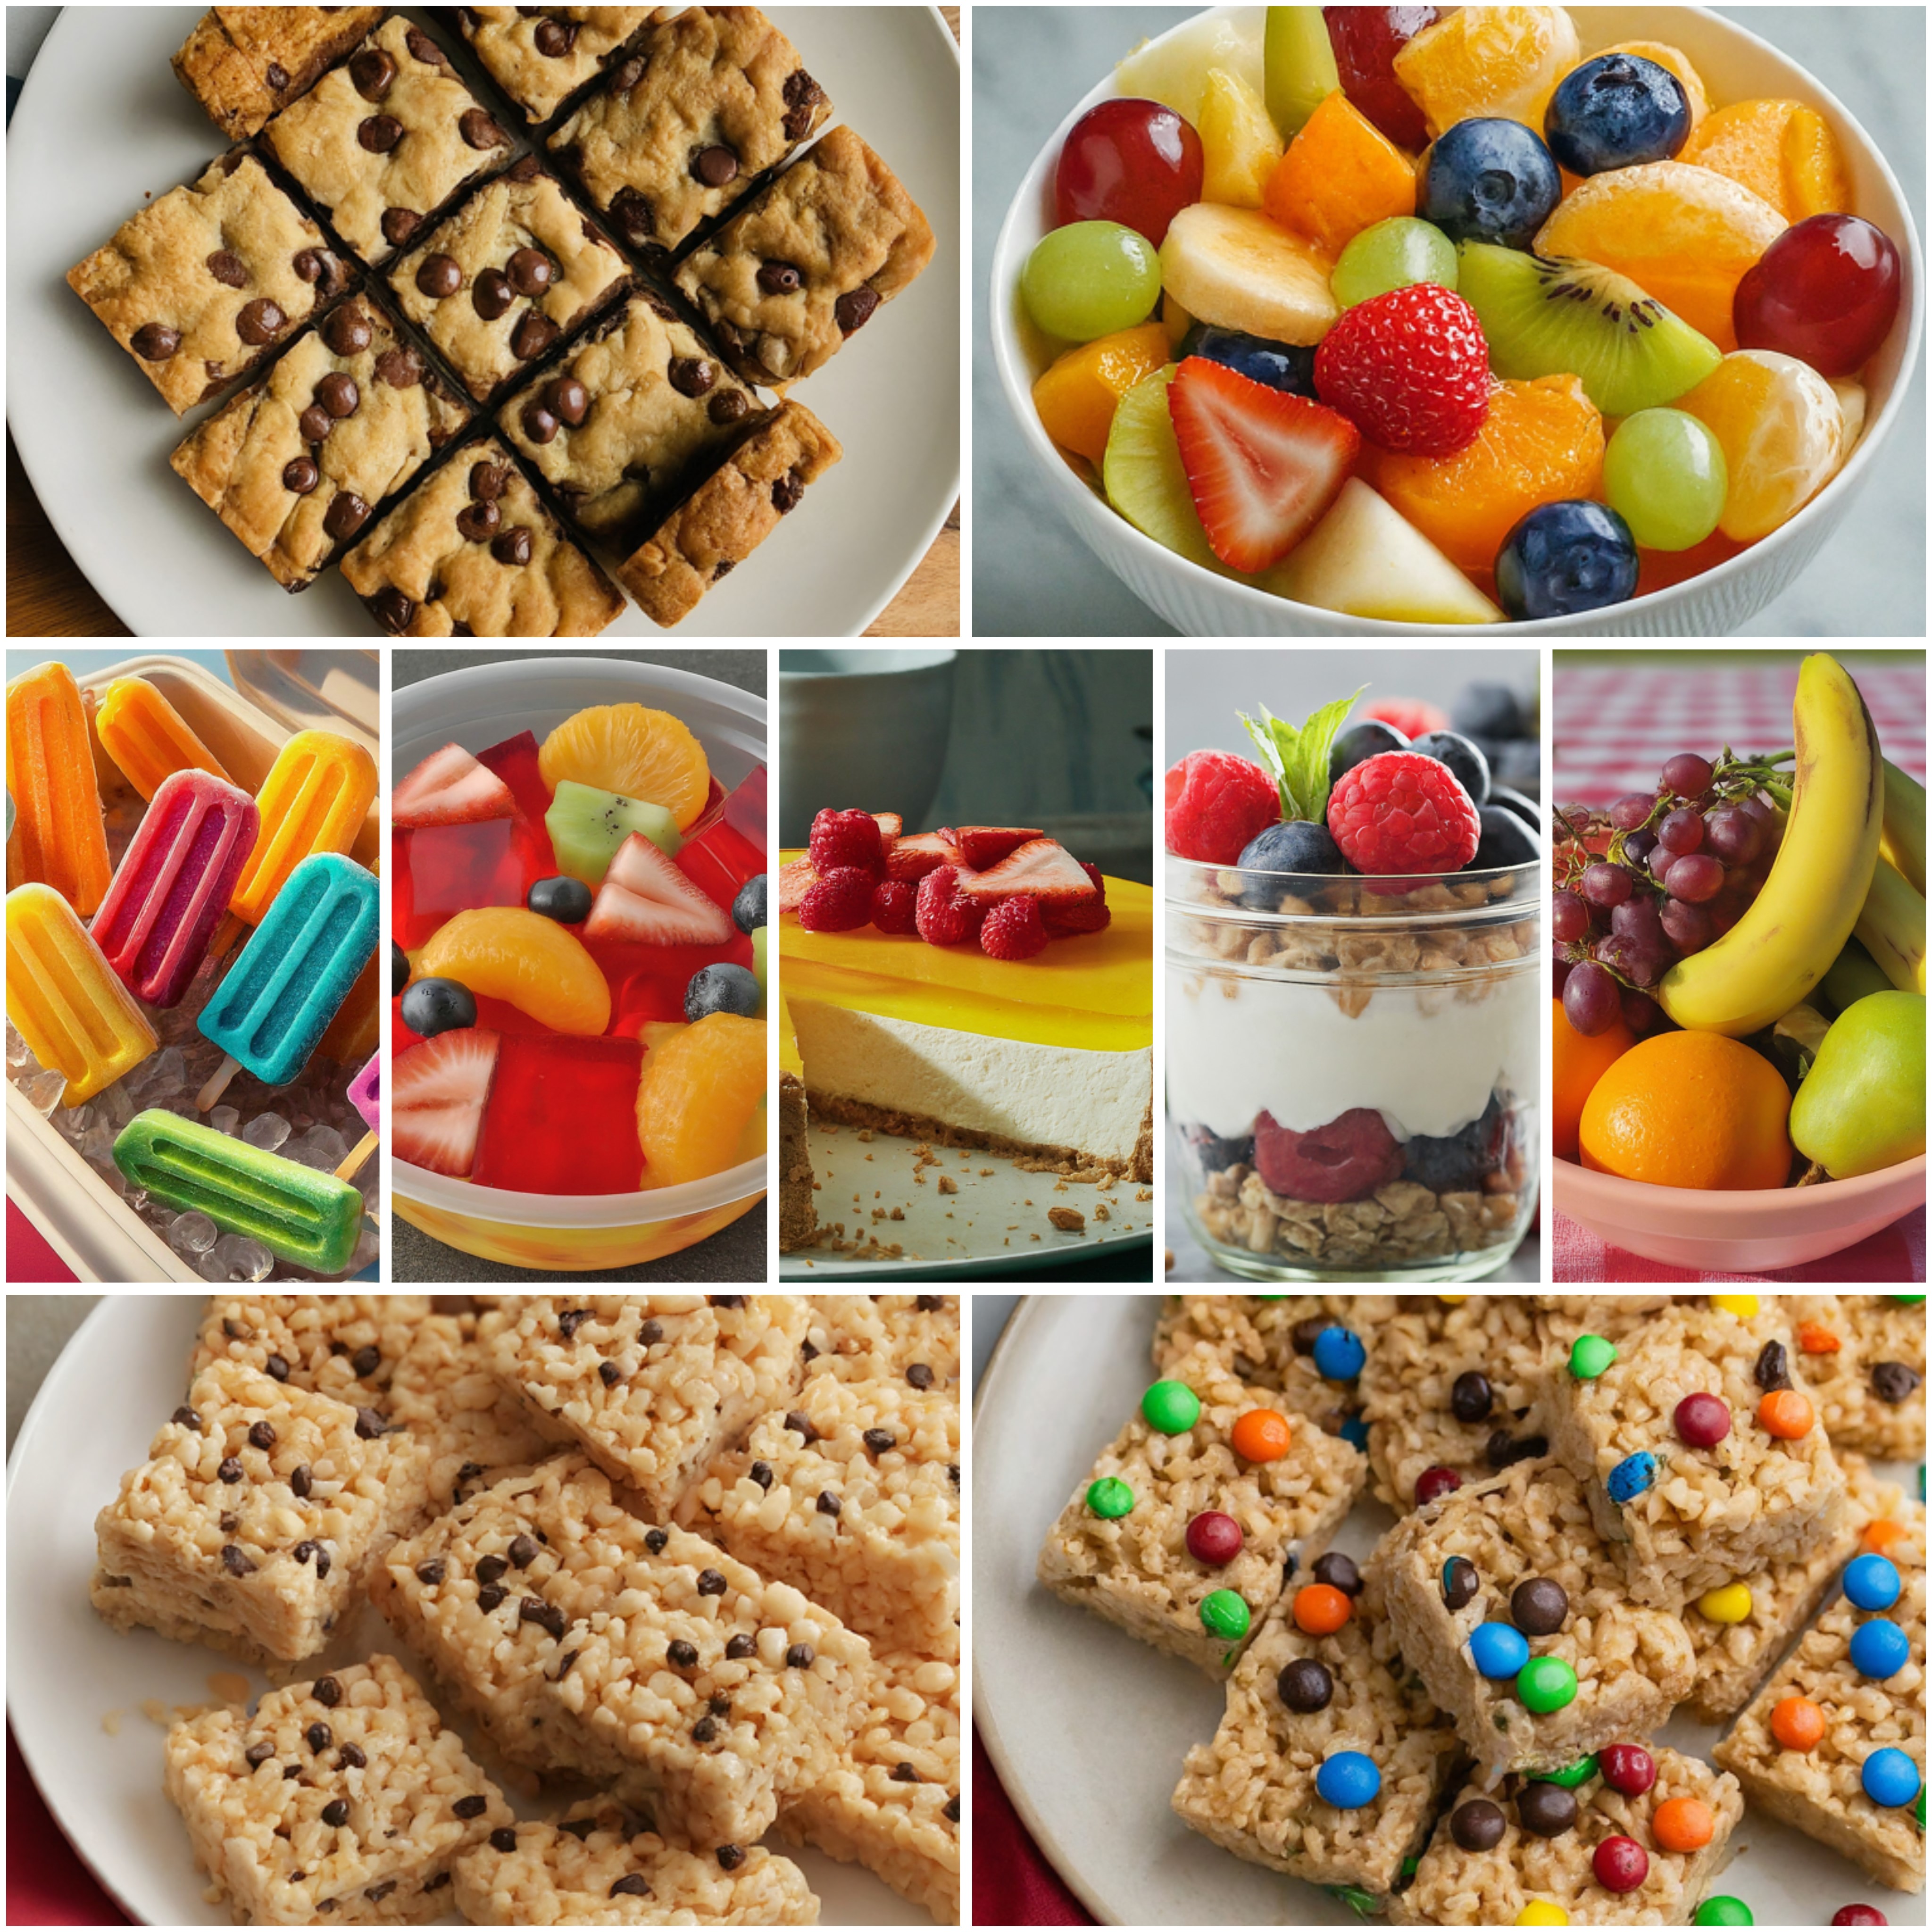
Now that you’ve decided on the “real food”, let’s talk dessert! You have to have dessert at a picnic. A picnic without dessert would be like going to the beach with no water to swim or wade in. It just can’t be! Here are some great ideas.
No-Bake Treats
- Fruit Salad: A classic and refreshing option. Choose a variety of seasonal fruits like berries, melon, grapes, or pineapple. You can add a squeeze of citrus juice or a drizzle of honey for extra flavor.
- Yogurt Parfaits: Layer yogurt and sliced fresh fruits in individual jars or containers for a portable parfait. Bring along the granola for people to add right before the start eating it. Granola can get pretty soggy pretty quick.
- Rice Krispie Treats: These no-bake treats are always a crowd-pleaser. You can add in extras like mini marshmallows, chocolate chips, or M&M’s.
Chilling Required
- Panna Cotta: This light and creamy Italian dessert is made with cream, sugar, and gelatin. It’s simple to prepare and can be flavored with vanilla, fruit puree, or even coffee.
- Cheesecake Bars: Make mini cheesecake bars for individual servings. A graham cracker crust topped with a creamy cheesecake filling is a delicious and portable option.
- Fruit Crisp or Crumble: Bake a fruit crisp or crumble at home and transport it in an airtight container. The crumb topping provides a nice textural contrast to the soft fruit filling.
Frozen Treats
- Ice pops or popsicles: These are a fun and refreshing treat for a hot day at the beach. Store bought or make your own at home.
- Frozen Yogurt: Pack frozen yogurt cups or make your own frozen yogurt. Bring along toppings like granola, fruit, or nuts.
Tips:
- Pre-portion desserts into individual containers or jars for easy grabbing and sharing.
- Pack your desserts in a cooler bag with ice packs to keep them chilled during transport.
- Choose fruits that are naturally durable for travel, like apples, oranges, grapes, or melons.
- Consider using insulated containers or stainless steel thermoses for added temperature control.
Classic Jell-O Treats
- Individual Jell-O Cups: This is a simple and fun option. Layer different colored Jell-O flavors in clear plastic cups. You can add sliced fruit, whipped cream, or mini marshmallows for extra flair.
- Jell-O Mold with Fruit: Create a decorative molded Jell-O dessert. Choose a fun mold shape and embed sliced fruits like strawberries, kiwi, or mandarin oranges within the Jell-O as it sets.
Fruity and Creamy Jell-O Delights
- Jell-O Fruit Salad: Combine cubed Jell-O in various flavors with fresh fruit pieces like grapes, berries, or chopped apples. This is a colorful and refreshing salad everyone will enjoy.
- Jell-O Poke Cake: Make a simple cake base and poke holes in it. Pour a fruity Jell-O mixture over the cake and refrigerate. The Jell-O seeps into the cake for a delicious flavor and textural contrast. I have found that this works better if the cake is baked a tiny bit longer than you sould normally do.
- Jell-O Cheesecake Bars: Create a no-bake cheesecake filling and layer it on a graham cracker crust. Top with a layer of fruity Jell-O for a delightful combination of creamy and refreshing flavors.
- Jell-O Parfaits: Layer crumbled cookies, diced Jell-O, and whipped cream in individual cups for a layered and flavorful parfait.
- Jello Jigglers: Make fun shapes using silicone molds and different colored Jell-O flavors. These jigglers are a playful and eye-catching dessert option, especially for kids.
Tips:
- Use a cooler bag with ice packs to keep your Jell-O desserts chilled during transport.
- Opt for clear plastic cups or containers to showcase the vibrant colors of the Jell-O layers.
- Consider sugar-free Jell-O options if needed.
- Get creative with your flavors and toppings! You can add in whipped cream, chopped nuts, mini chocolate chips, or even crumbled cookies for extra texture and taste.
Let’s Talk Drinks
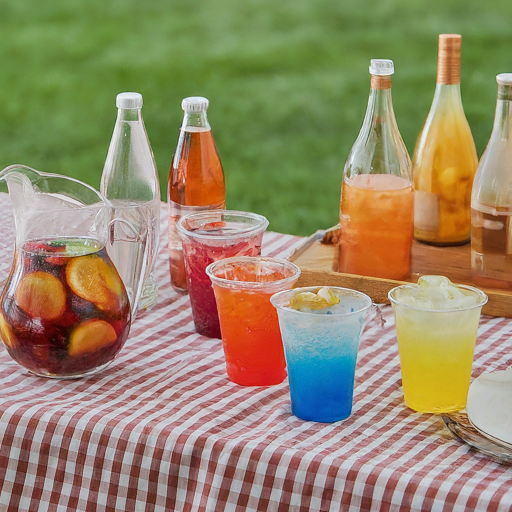
Always bring lots of bottled water. The heat and activity can bring on dehydration very quickly. No one wants that! Think about bringing other drinks such as:
- Sparkling waters/sodas
- Fruit juices
- Vegetable Juices/V8
- Wine, it’s a good idea to make Wine Spritzers at a picnic. No one wants to see Uncle fill in the blank stumbling around in the sand or water.
- Sangria, Click here to be taken to my 4th of July post that contains a delicious Sangria recipe. Like Wine Spritzers, Sangria has less alcohol per serving because of the fruit and soda mixed with the wine. This post also contains even more great recipe that are perfect picnic foods.
- Mocktails, click here to be taken to a post I did about 12 of these delicious alternatives.
I hope these ideas help to make your next beach (or any) picnic the best EVER! Stay tuned for Part 2 which will be about packing and carrying it all without going nuts!
The Perfect Beach Picnic Part 2 (preparing for fun)
Have a delicious and fun beach picnic!
Please Pass It On!

Discover more from The Janny Bee
Subscribe to get the latest posts sent to your email.

Join in - your voice matters!